Wed 1 Jul 2009
Welcome to the very first Salty Spoon contest! Tell me your favorite kind of bread and earn a chance to win an instant-read thermometer, the kind I (incessantly) recommend. The contest will remain open for one week, until midnight Pacific time on Wednesday, July 8. There are two ways to send me your entry, and you may use either or both once a day until the contest is over:
1. Comment on this post
2. Send me (@SaltySpoon) a tweet on Twitter
Good luck – I look forward to hearing about your favorites.
I’ve heard that real estate agents recommend baking a cake or a batch of cookies just before an open house. The hope is that the sweet smell emanating from the oven will beckon to prospective buyers. When we shopped for our place, we saw something like 40 houses in four days, so I can’t tell you with any certainty whether any of them smelled like cookies. There was one place in Marina del Rey that smelled like old soup, and several new condos that offered the seductive chemical high of new carpet fumes, but there are none that sing out in my mind as That Place That Smelled Like A Big Fat Cake.
I would have remembered roasting garlic. My allegiance to baked goods notwithstanding, if I were to select one aroma to illustrate the olfactory concept of Home, it would be the smell of garlic roasting in a hot oven. As it roasts, garlic softens, both in texture and intensity. It abandons the militant aggression it so favors when raw and matures into something warmer, friendlier, with a softer smile. If raw garlic is an outspoken 19-year-old, defiantly braless and passionately committed to a new cause biweekly, then roasted garlic is the 45-year-old that kid grows up to be, who reads edgy historical fiction, drinks more green tea than coffee, and always listens patiently.
When I cook with garlic, I breathe a contented sigh every time I reenter the kitchen. The scent surrounds me, offering a time-worn flannel shirt for the nose. It reaches in and puts me at ease; even the overhead Ikea tracklights seem fuller and more golden. A simple batch of aigo bouido – a garlic soup from Mastering the Art of French Cooking – simmering on the stove sets guests’ faces aglow as they enter for dinner. Graceful billows of garlicky steam tempt them to the table. And a loaf of bread made with a rosemary garlic paste beams as it bakes, filling the whole house with herbed wizardry. Almost enough to sell the place.
Roasted Garlic Rosemary Bread
Adapted from The Pioneer Woman
Ingredients
1 head of garlic
3T fresh rosemary
20 oz. flour - see note (a little over 4 cups)
8 oz. warm water
2t table salt
1t active dry yeast
4T butter, melted
1T olive oil, plus more for the pan
Kosher salt for sprinkling
Equipment
Large bowl
6-qt Dutch oven with a lid or a sturdy, rimmed dish (like a ceramic pie plate)
Rundown
- Trim the garlic and drizzle with oil
- Roast
- Make the garlic-rosemary paste
- Mix everything
- Knead
- Raise
- Shape
- Bake
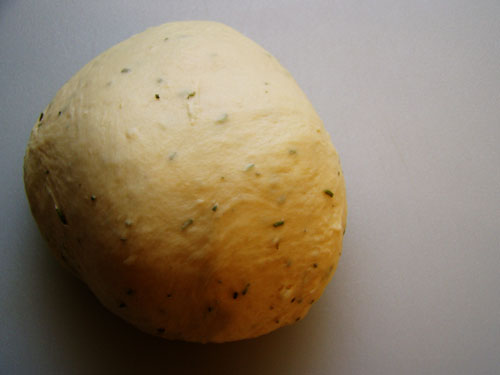
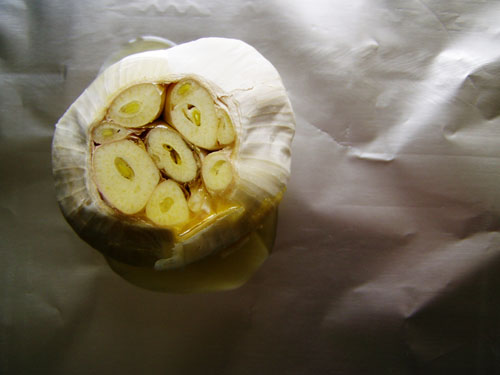
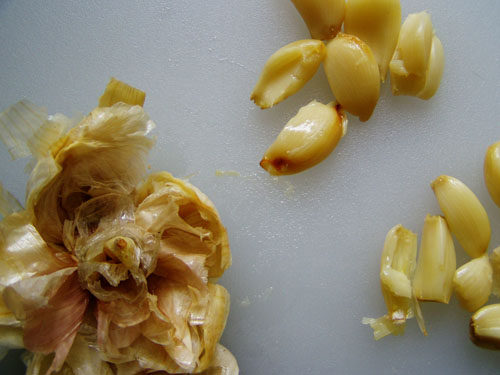
At least an hour before you begin making the rest of the dough, preheat the oven to 400. Chop the top off the head of garlic and lay it cut-side up on a large square of foil. Drizzle with the olive oil. Fold the sides of the foil up and around the garlic to make a packet. Roast for 40 minutes. When it’s done, pull the packet out of the oven and open (carefully!) with kitchen tongs so that it can begin cooling. When you can handle it, start snipping away at the skin and popping the roasted cloves free. Seriously, be careful not to burn your fingers. It sucks.
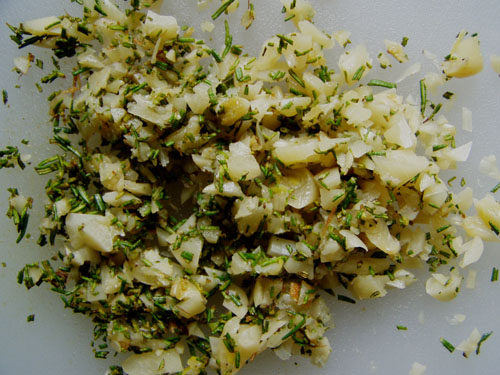
Collect the roasted garlic cloves and chop together with the rosemary until you have a coarse paste. Mix the paste into the melted butter and set aside for a moment.
Sprinkle the yeast into the water and let it rest for 5 minutes – when it’s ready, it will begin to form a foamy cloud.
Combine all of the ingredients in a large bowl. If you have a stand mixer, fit it with the dough hook and let it go for 10 minutes. If you are mixing by hand, stir with a spoon until everything is fully combined, then turn out onto a floured surface and knead until it is smooth and elastic. It’s ready when you can pass the windowpane test - tear off a small ball of dough and give it a little stretch in a few opposing directions. If you can make it translucent without tearing it, it’s ready.
Return the dough to an oiled bowl and cover with a clean dishtowel. Allow it to rise at room temperature until doubled, approximately 90 minutes. Once doubled, preheat the oven to 450 and knead the dough gently a few times. Shape it into a ball and set aside.
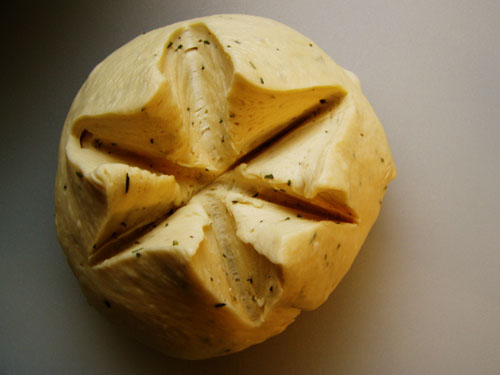
Generously grease a 6-qt Dutch oven with olive oil and place the ball inside. If you are using a pie plate or something similar, just spread a few tablespoons of oil around the bottom and place the ball in the center. Score the top of the dough a few times - I have done it with an X as well as a six-pointed star. As it bakes, it will open and bloom to make a wonderful design.
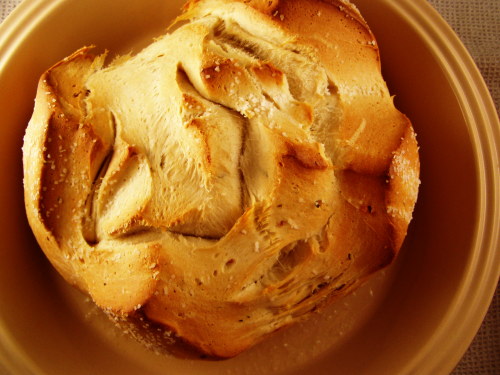
Drizzle another few tablespoons of olive oil over the top of the ball and sprinkle with kosher salt. If you use the Dutch oven, bake for 30 minutes with the lid on, then another 15-30 with the lid off until it is gently golden. Once you’ve uncovered the pot, check in at 15 minutes - don’t let it get too brown. If you use the pie plate, bake for 45 minutes or until it gets that golden glow. When finished, the internal temperature should read around 200 degrees on an instant-read thermometer.
Carefully remove the loaf from the pot (remember that the sides will be very hot - I usually get ‘er done with the help of kitchen tongs, a sturdy spatula, and prayer). Cool for 10 minutes before diving in.
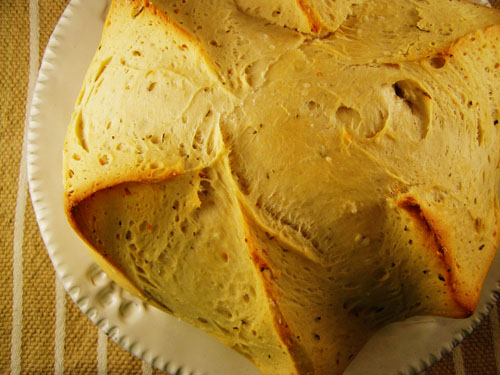
Flour note - the original recipe calls for bread flour. I often find myself with more AP flour on hand than bread flour. It works just fine with AP, though the extra gluten in the bread flour adds more loft. Use either, but know that they will result in two different textures. The AP version is sturdy enough to serve as a stunt double for sandwich bread when you, ahem, find yourself without any.
Descubra Como Baixar o Aplicativo sportbet e Jogue com Facilidade e Ótima Performance
Aproveite 100$ de Bônus ao Se Registrar no lottoland - Cadastre-se Já!
Com 7gamesbet, Você Conta com Suporte ao Cliente 24/7 Para Soluções Rápidas!
premier bet Oferece Diversão nos Jogos Populares e Bônus Imperdíveis Para Você
Nunca Fique na Mão: Atendimento bwin 24 Horas para Resolver Suas Dúvidas Imediatamente!
Entre na Upsports Bet e Descubra Jogos Populares com Recompensas Justas e Bônus Fantásticos
Se você precisar de ajuda a qualquer momento, a pinnacle oferece suporte ao cliente 24/7. Com um time altamente treinado e pronto para solucionar qualquer dúvida ou problema que você possa ter, a plataforma garante que sua experiência de usuário seja tranquila e sem obstáculos. Seja para questões de pagamento, bônus ou navegação no site, a equipe de suporte está sempre pronta para ajudar, com respostas rápidas e soluções eficientes, tudo disponível online a qualquer hora do dia ou da noite.
dobrowin: Suporte Ao Vivo 24 Horas Para Resolver Qualquer Problema Imediatamente!
Como se Registrar no winzada 777 e Obter 100$ de Bônus de Boas-Vindas!
juntosbet: Como Sacar Seus Fundos de Forma Rápida e Sem Preocupações!
apostaganha: Como Retirar Seus Fundos de Forma Simples e Rápida, Com Total Segurança!
Novo Jogador? Ganhe 100$ de Bônus no fbbet ao Se Registrar!
136bet: Entre no Jogo e Aproveite Bônus Para Potencializar Seus Jogos Populares
Jogue e Ganhe com os Jogos Populares da realbet e Bônus Que Surpreendem
Bônus de 100$ para Novos Jogadores no flames – Cadastre-se Agora!
seubet: Baixe o Aplicativo e Explore Uma Interface Amigável com Jogos e Funcionalidades Rápidas
Aprenda a Sacar Seus Ganhos do pixbet de Forma Segura e Rápida!
Precisa de Ajuda no dobrowin? Atendimento ao Cliente Disponível 24 Horas por Dia!
Bônus de 100$ para Novos Jogadores no 8800 bet – Cadastre-se Agora!
Como Retirar Seus Ganhos no bet vitoria: Processo Simples e Seguro para Sacar Seu Dinheiro!
Soluções Rápidas e Profissionais: nacionalbet Tem Suporte ao Cliente 24 Horas!
What’s up, yes this post is really good and I have learned lot of things from it
about blogging. thanks.
Feel free to surf to my homepage - nordvpn coupons inspiresensation (t.co)
Today, I went to the beach with my children. I found a sea shell and gave it to my 4 year old daughter and said “You can hear the ocean if you put this to your ear.” She put the shell to her ear and
screamed. There was a hermit crab inside and it pinched her ear.
She never wants to go back! LoL I know this is entirely off topic but I had to tell someone!
Feel free to surf to my web site nordvpn coupons inspiresensation
Whats up very cool website!! Man .. Beautiful .. Amazing ..
I will bookmark your web site and take the feeds additionally?
I’m glad to seek out so many useful info right here within the put up, we
want develop more strategies on this regard, thank you for sharing.
. . . . .
My page … Nordvpn Coupons Inspiresensation
350fairfax nordvpn coupon
Hi! This post could not be written any better! Reading this post reminds me of my previous room mate!
He always kept talking about this. I will forward this
article to him. Fairly certain he will have a good read. Many thanks for sharing!
https://widge.de/aloh.php?candi=estatísticas+de+alavés+x+betis
https://cherevkolab.com/media/aloh.php?candi=estatísticas+de+betis+x+real+sociedad
WOW just what I was searching for. Came here by searching for eharmony special coupon code 2025
What’s up to all, how is all, I think every one is getting more
from this web page, and your views are good designed for new people.
My web blog vpn