Sat 22 Aug 2009
While You Sleep | Challah
Posted by Bria under Baking
I can’t go another day without sharing my go-to challah recipe with you. It’s actually my mom’s recipe, which just goes to show that you don’t have to be born Jewish to inherit a perfect recipe for a most emblematically Jewish food. On occasion, I turn to the recipe in Joan Nathan’s splendid Jewish Cooking In America, her amazing oeuvre that reads the way I think a Jewish cookbook should – rich headnotes and historical asides paired with flawlessly-voiced procedures. Though I love Joan’s recipe, I confess that I find it a bit rich for regular use. I wax rhapsodically through phases of regular Shabbat observance in the form of Friday night dinners with candles and challah. For those weekly episodes, my mom’s recipe triumphs. Light and simple, the dough can be thrown together on Thursday evening and baked on Friday, either in the morning or just before dinner. To wit, I started a batch at 11pm a few weeks ago so that I could bake the loaves before work the following day in order to send them to friends in other cities (long story). A bit of mixing, a bit of kneading, a brief rest (while I cleaned the kitchen and brushed my teeth), and they were ready to shape before bed. Overnight, the refrigerator’s cool embrace slowly coaxed the yeast to plod along its flavor-making path gently and smoothly, just the way yeast prefers. Laboring while I slept, the bread readied itself for a morning bake. Perfect.
In the morning, the smell emanating from the kitchen was warm and sweet. It crept down the hall and into our bedroom, rousing my sleepy husband who wandered into the kitchen asking “are there pancakes?” as he rubbed his bleary eyes. Thankfully, he wasn’t disappointed to find that I was making challah instead, and that one of the three loaves was for him.
One request: please learn to say it correctly. HAH-lah. The first sound is a soft, guttural ‘h’ and not a hard ‘ch’ as in chalk.
I should note that this dough is infinitely adaptable to whatever shape you like. In elementary school, my mom would shape the loaves to look like teddy bears, which we would adorn with chocolate chip eyes and noses before presenting them to my teachers as Christmas gifts. I will give you a few minutes to join me in giggling at the irony of using challah dough to make Christmas bears for my teachers in Utah, the only place where Jews are considered gentiles. It’s the little things that make me smile. Shabbat shalom, my friends.
Challah
Makes 2 large loaves (or 3 medium loaves)
Ingredients
6 – 7 cups all-purpose flour
4 ½ t active dry yeast (2 packages)
½ C sugar
1 ½ t salt
1 stick softened butter (unsalted)
1 1/3 C hot tap water
4 eggs at room temperature, plus an additional egg at baking time
Splash of milk
Oil for the bowl
Rundown
- 2 cups of flour plus yeast, sugar, salt in the bowl
- Mix in butter
- Mix in water
- Mix in eggs and 1 ½ cups flour
- Mix in more flour until dough
- Knead
- Rest 20
- Shape
- Chill
- Bake
Combine 2 cups of flour with the yeast, sugar, and salt in large bowl and stir well. Add softened butter and stir again. It will not look at all combined – just a hugely shaggy mess. Add the hot tap water and beat with electric mixer at medium speed for 2 minutes until well mixed and elastic.
You want your eggs to be room temperature, but don’t freak out if you can’t remember to set them out early to warm up. Put them in a small bowl with some warm water for a few minutes and they’ll be perfect. Add the eggs and 1 ½ cups more flour. Beat with an electric mixer at high speed for 1 minute or until thick and elastic. Gradually stir in enough of remaining flour with a wooden spoon to make a soft dough that leaves the sides of bowl. Turn it out onto a floured board, keeping at small dish of flour at hand in case things get sticky as you proceed.
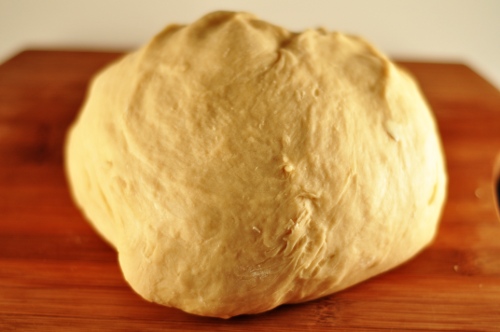
Knead for 5-10 minutes until it is smooth and elastic, adding some of the additional flour as needed to keep the dough from sticking to your work surface. Wash and oil the mixing bowl. Place the dough in the bowl, turn it over once to ensure it’s well-coated, and cover with a clean dish towel for 20 minutes. The dough will swell slightly, but do not expect an overtly visible change.
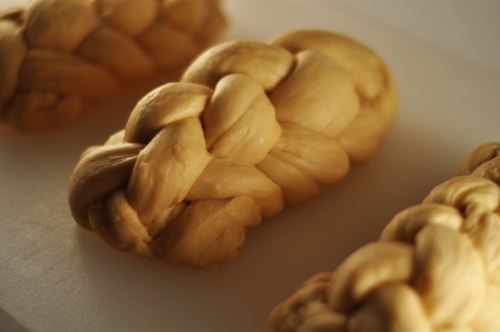
To shape the dough, divide it into two even pieces. Set one piece aside and cover with the dish towel. Gently roll the first piece into a fat log to make it easier to further divide into equal pieces. I favor a traditional six-part braid, but three or four pieces also work well if you are more familiar with those braids. If you’re interested in tackling the six-part braid (and it really is divine when it bakes), watch this video (the beginning focuses on how to get the snakes of dough ready to braid; if you just want to know how to make a six-part braid, skip to the 2-minute mark). No matter which type of braid you choose, divide the dough into equal pieces and roll each piece into a snake. Aim to have snakes of equal length and thickness. Pinch the ends of the snakes together and braid until you reach the other ends. Tuck both ends securely under the loaf.
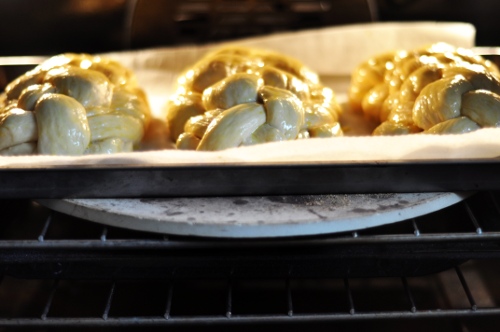
Repeat with other half of the dough and set both loaves on a parchment-lined baking sheet. Cover loosely with plastic wrap and refrigerate for 2-24 hours. When you are ready to bake, remove the loaves from the refrigerator and let them begin to come to room temperature while you heat the oven to 355 (approximately 10-15 minutes). Beat an egg in a small dish with splash of milk and gently brush over the loaves. Bake them for 35-40 minutes, slightly less if you went with three loaves as they will be smaller. When they are done, the loaves will be a rich, golden brown and will sound hollow when thumped on the bottom.
Two things to note: first, expect the loaves to grow substantially in the oven. Don’t be disappointed when you pull them from the refrigerator in the morning and find that they haven’t swelled to gargantuan proportions. It’s coming, I promise. Second, this is an extremely soft bread, so it is much better suited to tearing than cutting with a knife. If you must slice it, do it on the second day, when it will make killer French toast.


Article writing is also a fun, if you be familiar with then you can write or else it is complex to write.
Great delivery. Sound arguments. Keep up the amazing work.
In this awesome pattern of things you receive a B+ for effort. Exactly where you actually confused me personally was on the particulars. You know, it is said, details make or break the argument.. And it could not be more correct right here. Having said that, allow me say to you what exactly did do the job. Your text can be highly powerful and this is probably why I am taking the effort to opine. I do not make it a regular habit of doing that. Secondly, despite the fact that I can certainly see the leaps in reason you come up with, I am not necessarily convinced of how you seem to connect your details which in turn make your conclusion. For now I will subscribe to your issue however trust in the future you actually link your facts better.
Oh my goodness! Amazing article dude! Thank you, However I am encountering troubles with your RSS. I don’t know why I can’t join it. Is there anyone else getting similar RSS problems? Anybody who knows the answer will you kindly respond? Thanks!!
I was skeptical relative to CBD at initial, but after trying them like [url=https://joyorganics.com/collections/cbd-gummies ]gummy cbd[/url], I’m absolutely impressed. They present a handy and enjoyable sense to pick CBD without any hassle. I’ve noticed a calming force, primarily in the evenings, which has helped with both weight and sleep. The best as regards is the pre-measured dosage, so there’s no guessing involved. If you’re looking for an uncomplicated and yummy way to know CBD, gummies are unquestionably benefit all things—just modify sure to buy from a estimable sort!
I was skeptical not far from CBD at first, but after exasperating them like [url=https://joyorganics.com/collections/usda-certified-cbd-oil-tinctures ]organic cbd tincture[/url], I’m exceptionally impressed. They offer a commodious and enjoyable sense to undergo CBD without any hassle. I’ve noticed a calming effect, remarkably in the evenings, which has helped with both weight and sleep. The pre-eminent generally is the pre-measured dosage, so there’s no guessing involved. If you’re looking on the side of an easy and yummy detail to know CBD, gummies are unquestionably advantage all things—nothing but survive steady to gain from a estimable name brand!
F*ckin’ remarkable things here. I’m very happy to peer your post. Thanks a lot and i’m looking forward to contact you. Will you please drop me a e-mail?
I came across an article that talks about the same thing but even more and when you go deeper.
This is a good tip especially to those new to the blogosphere. Short but very accurate informationO Thank you for sharing this one. A must read post!
My spouse and I stumbled over here by a different page and thought I might
check things out. I like what I see so now i am following you.
Look forward to exploring your web page for a second time.
Thanks for finally writing about > Challah | The Salty
Spoon nordvpn coupons inspiresensation
I’m very pleased to find this page. I wanted to thank you
for ones time for this fantastic read!! I definitely loved every little bit of it and I have
you saved as a favorite to check out new information in your blog.
my web page: nordvpn coupons inspiresensation
When I originally commented I clicked the “Notify me when new comments are added” checkbox and
now each time a comment is added I get several e-mails
with the same comment. Is there any way you can remove people
from that service? Many thanks!
Feel free to surf to my blog Nordvpn coupons inspiresensation (T.Co)
350fairfax nordvpn promotion
It’s an awesome piece of writing in favor of all the online viewers; they
will get benefit from it I am sure.
Simply wish to say your article is as amazing. The
clarity in your post is just nice and i can assume you are an expert on this subject.
Well with your permission allow me to grab your feed to keep updated with forthcoming post.
Thanks a million and please continue the gratifying
work.
Here is my web site eharmony special coupon code 2025
Excellent blog right here! Also your web site so much up very fast!
What host are you the use of? Can I am getting your affiliate hyperlink to your host?
I desire my site loaded up as quickly as yours lol
My web page: vpn