Tue 28 Apr 2009
Nobody Here But Us Chickens
Posted by Bria under Main Dishes
The first time I roasted a chicken, my dad talked me through it over the phone. The conversation went something like this:
Dad: Is the oven hot?
Me: Yeah.
Dad: Okay, put the bird in the roasting pan.
Me: Mmhmm, done.
Dad: Now spray it with Pam.
Me: The pan, or the bird?
Dad: The bird - just give it a good spray all over.
Me: Got it. Now what?
Dad: Peel an onion, and just shove the whole thing inside.
Me: Inside…where?
Dad: The bird.
Me: In its butt?
Dad: We generally call that the cavity, but yes. Pop it in.
Me: Are you serious?
Dad: Yes! It will taste good.
Me: Okay, one onion in the butt coming up.
Dad: I’m going to pretend I didn’t hear that.
Me: Go on.
Dad: Shake a little salt and pepper over the outside and stick it in the oven. Check it in an hour.
Me: That’s it?
Dad: That’s it.
And that really is it. You can get a delicious roast chicken with almost zero work. If you’ve never cooked a chicken before, and if you break out in hives of OH MY G-D THIS IS SO COMPLICATED when you read the rest of this recipe, go ahead and try the Butt Onion method. But if you are feeling at all adventurous (and by “at all” I mean on a “dimes in your penny loafers” level), try your hand at the brine and paste method I describe below. It’s really, really delicious. And the smells that will fill your kitchen will blow your mind.
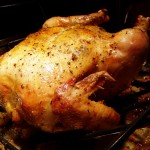
This recipe is an absolute stunner if you are trying to impress someone with your cooking skills. It comes out looking like a million bucks, and your guests will be rendered speechless when they take a bite of the moistest, tastiest chicken they have ever had. The brining will assure you very moist meat (heh) - just don’t overcook it. I know the spectre of undercooked chicken and all its various evils can keep the best of us up at night, but a meat thermometer or instant-read thermometer is all the backup you need. I highly recommend an instant-read for its speed, accuracy, and overall niftiness. I came upon this one by way of Cooks Illustrated, and was impressed that it was both extremely functional and highly affordable. Though not absolutely critical, it’s one of those pieces of equipment that can really streamline your cooking process.
Perfect Roast Chicken
Adapted from Cooks Illustrated
Brine
One medium, whole fryer or roasting chicken
10 cloves of garlic, unpeeled
½ cup kosher salt
1 T whole peppercorns
2 T herbs de provence
Water
Vessel large enough to hold your chicken, submerged
Paste
6 cloves of garlic, peeled
½ cup olive oil
1 t sea salt
1 T herbs de provence
Et cetera
Additional olive oil for basting
Potatoes, if desired
The first step takes place a full hour before you get the bird in the oven, so plan accordingly. Depending on how much the thing weighs, this recipe typically takes me between 2 ½ and 3 hours to execute from start to finish.
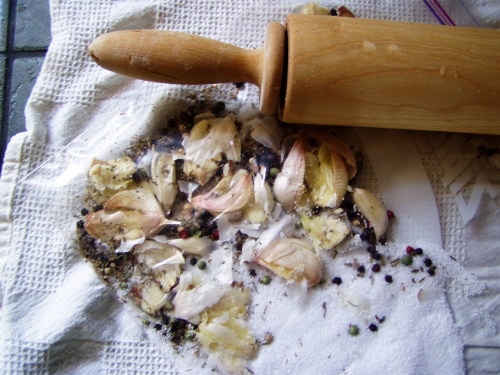
Place the unpeeled garlic, salt, peppercorns, and herbs de provence in a gallon-sized freezer bag. Smoosh as much of the air out as you can and seal the bag. Using a rolling pin or something else solid, bash the contents of the bag until the garlic is in a state you would describe as “smashed” and the other stuff is starting to smell good.
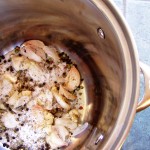
Dump the contents of the bag in a large stockpot or giant bowl and add the chicken (make sure you check the cavity and take out any of the extra bits, if they are included). Add enough cold water to cover the bird and stir as best you can to start dissolving the salt. Cover and place in the refrigerator for 1 hour.
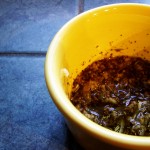
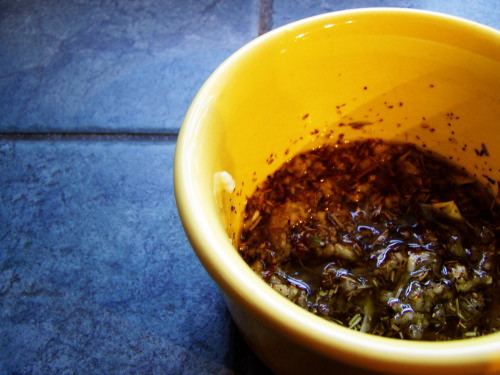
Towards the end of your brining hour, make the paste by combining the peeled, minced garlic, olive oil, salt, and herbs de provence in a small bowl. Preheat the oven to 450. If you are using a roasting pan with a rack, spray the rack with a little oil.
Remove the brining biddie from your fridge. Line a dinner plate with a few layers of paper towels and gently set the chicken on them, making sure to turn the body cavity side down to let the extra water drain before you do. Blot it with paper towels, and turn it breast-side up (the bones of the drumsticks will be pointing up at you).
This next part will sound tricky, but is actually really easy once you get your hands in there and start poking around. With clean hands, slide your fingers up under the skin that covers the breast and thighs. You will start at the opening by the cavity and just slip and slide your way under the top layer. Dig around in there, gently (that’s what she said – sorry, I couldn’t resist) and really open it up to make room for the paste. Grab a few fingerfuls of paste and shove it in there, smooshing around until you can see that it’s making its way far under the skin. Add another little handful to the cavity, and smear the rest on the outside of the bird. If you run out of paste, just use some olive oil.
In a perfect world, you would use twine to tie the legs together here, but I never have twine when I need it so I never do this step. Still tastes like chicken.
Place the bird breast-side down on the rack and roast 15 minutes. If you are going to add potatoes, use this time to get them ready – wash, peel, cut into relatively even chunks that are approximately 1” by 1”. Toss them in a bowl with a little olive oil, salt, and pepper.
After the first 15 minutes of roasting, pull the pan out of the oven and scatter the potatoes around the pan. Roast for another 15 minutes.
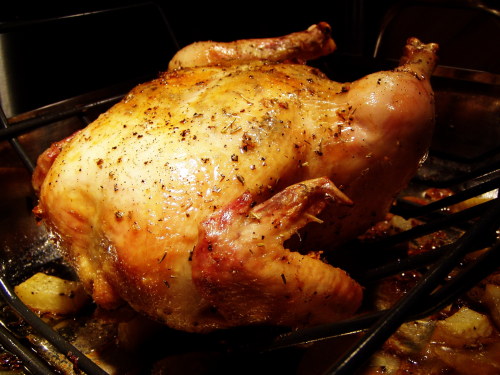
Pull the pan out again and decrease the oven temperature to 375. Using tongs, paper towels, calloused hands, whathaveyou, flip the bird over so that the breast is facing up and lightly brush with a little more olive oil. Return to the oven and roast until a) the skin is golden, b) the thickest part of the breast registers at least 160 degrees on an instant read thermometer, and c) the inner thigh registers 165-170 degrees. Yes, you can use a regular old meat thermometer, but a decent instant read is so much better and is surprisingly inexpensive.
This last part of the roasting will take anywhere from 30 to 50 more minutes, depending on the size of your chicken. Set your timer to 30 and start checking every 10 minutes thereafter. If the skin doesn’t look at all golden, it’s not done. It will be beautiful, fragrant, moist, tender, and delicious when it reaches the finish line. Another way to test doneness - wiggle the drumstick. If it moves easily, it’s done.
After it comes out of the oven, transfer the chicken to a plate and let it rest for 5 minutes or so. Carve to the best of your abilities and enjoy. I will confess that I am not the best carver in the world. This video is fantastically helpful, though I think the only way to really get good at this is to screw it up a time or two and learn from your mistakes. Even if it’s ugly, it will still taste like chicken. Once you have as much meat off the bones as you can manage, you can use the carcass to make delicious, cheap chicken stock, provided that you have an onion, a big pot, and an afternoon (stay tuned for a recipe).
I’m pretty committed to not reading blogs - I am too good at procrastinating as it is - but you write so well, and on food, so sign me up.
And a comment (because I am who I am)… There is this widget called the “Flavor Shaker” that does what you do with the gallon bag and rolling pin - only much more thoroughly and evenly. I have one and I like it a lot - see here:
http://www.flavourshaker.co.uk/
Thanks, Noam! The Flavor Shaker looks so neat - I might have to order one. I would have to see how much control you have over the level of crushiness for the brine bag contents. The garlic doesn’t want to be *too* crushed, just banged up enough to release its goodness. But I love the idea of being able to crush more easily.
The rolling pin v. spices process, cathartic as it may be, can be kind of a pain. And possibly damaging to one’s countertops, depending on the level of catharsis you’re trying to exact from those poor spices.
Mia and I were wondering if the brining process is similar to the marinating process. That is, can I stick the bird in the brine before work and come back to it in the evening?
That’s a good question. I’m inclined to say no. The last time I made this chicken, I brined for longer than an hour and it was a little salty. However, I can tell you that I made this a few months ago with John’s cousin and we brined for something like 30 or 40 minutes because we were pressed for time. It worked out beautifully. Here’s what I would do in order to make this work on a weeknight - that morning, get the brine bag ready and pull the extra bits out of the chicken. As soon as you get home, pop the bird and the bag contents in the pot and stick it in the fridge. Get changed, make the paste, open some wine, cut up your potatoes, and get the oven preheating. By the time you have everything else ready to roll, the chicken will have had a decent chance to brine.
Let me know how it turns out!
Beautiful. We are planning on trying it out this coming Tuesday so I’ll take pictures and give you a full report!
So, I made this for my Dinner Club this week, and they were totally dazzled! In fact, one of the best cooks in the Club just asked me for the recipe, so I pointed her here! (Hi J!) I did a bunch of breasts & thighs for ease of serving (buffet style for 11 people).
I actually over-brined it this time (oops, should’ve read the comments!!) but serving it fresh out of the oven, it’s just so delicious, I don’t think it read as TOO salty. However I did notice the super saltiness more the next day when I reheated a piece for lunch.
My first attempt to make this dish for Dinner Club was a month ago…. It proved to be a day of mega drama, problem upon problem, culminating in this: Chicken. All. Over. Kitchen. Floor.
That’s right, 14 pieces of delicious, brined, paste-rubbed, raw garlic rosemary chicken — covering the tile. It was bad. Very, very bad. My friend Billy witnessed the incident (he was there to help me carry it all over to his apt, where Dinner Club is hosted) and all he could say was, “It smells sooooo good!!”
In a fit of desperate panic, I threw in the towel and used my “get out of jail free card” to order in Mexican for the group instead.
I cleaned ‘em up and threw ‘em in freezer bags. I cooked them up a few at a time over the next few weeks and let me tell you, each one was pure deliciousness. I think the brining might help this dish do really well in freezer/cooking/reheat cycle — moist and delicious every time.
Anyway, this time it went off without a hitch — and now I am officially a member of Dinner Club!
Oh my goodness, Sara, that’s hilarious! I’m glad you were able to salvage the first batch for yourself. Using the breasts and thighs is a great idea - what was your timing like to get them done?
I’m thinking about a lasagna dinner menu sometime soon - will likely be a good one for your next turn as hostess of the Dinner Club